FLUKA installation: Difference between revisions
No edit summary |
No edit summary |
||
| Line 17: | Line 17: | ||
Follow the registration process at [https://www.fluka.org/fluka.php?id=secured_intro FLUKA User Registration and Download] (Public email providers are blocked, so use your UiB email or other institutional email-address) | Follow the registration process at [https://www.fluka.org/fluka.php?id=secured_intro FLUKA User Registration and Download] (Public email providers are blocked, so use your UiB email or other institutional email-address) | ||
Then download your FLUKA package of choice from [https://www.fluka.org/fluka.php?id=download&sub=packages FLUKA Download], most likely you will want the latest ''flukaXXXX.XX-linux-gfor64bitAA.tar.gz'' package. | Then download your FLUKA package of choice from [https://www.fluka.org/fluka.php?id=download&sub=packages FLUKA Download], most likely you will want the latest ''flukaXXXX.XX-linux-gfor64bitAA.tar.gz'' package. | ||
Install flukaxxxx-xx-linux-gfor64bitAA.tar.gz by creating the FLUKA folder and unpacking the package contents to it: | Install flukaxxxx-xx-linux-gfor64bitAA.tar.gz by creating the FLUKA folder and unpacking the package contents to it: | ||
| Line 28: | Line 24: | ||
$ tar –xzvf fluka..... # Unpack installation file | $ tar –xzvf fluka..... # Unpack installation file | ||
$ make #(this creates the default executable flukahp and compiles auxiliary programs in the directory ''flutil'') | $ make #(this creates the default executable flukahp and compiles auxiliary programs in the directory ''flutil'') | ||
Once installed, set some environmental variables at the end of your .bashrc file: (Type ''gedit .bashrc'' in your terminal to open and edit this file with gedit, or some other text editing software you wish to use) | |||
export FLUPRO=/pathto/FLUKA #Path to the FLUKA folder where you installed FLUKA | |||
export FLUFOR=gfortran #We use the gfortran version of FLUKA | |||
==Installation of flair and flair-geoviewer== | ==Installation of flair and flair-geoviewer== | ||
Revision as of 10:04, 10 May 2017
Prerequisites
The required software and packages in order to use FLUKA in combination with flair (FLUKA Advanced Interface) and flair-geoviewer:
Gfortran/gcc
Gnuplot
Python interpreter version V2.6 or greater
Tcl/Tk version V8.5 or greater
Tkinter toolkit
python-imaging
python-imaging-tk
tk-dev
python-dev
pydicom (only needed for use with dicom/ct-scans)
Installation of FLUKA
In order to be able to download FLUKA from the FLUKA website it is mandatory to be registered as FLUKA user. Follow the registration process at FLUKA User Registration and Download (Public email providers are blocked, so use your UiB email or other institutional email-address) Then download your FLUKA package of choice from FLUKA Download, most likely you will want the latest flukaXXXX.XX-linux-gfor64bitAA.tar.gz package.
Install flukaxxxx-xx-linux-gfor64bitAA.tar.gz by creating the FLUKA folder and unpacking the package contents to it:
$ mkdir Fluka #create Fluka directory at your location of choice
$ mv Downloads/fluka.... Fluka/ #move downloaded tar.gz file to your newly created FLUKA folder
$ cd /pathto/FLUKA #enter the FLUKA folder
$ tar –xzvf fluka..... # Unpack installation file
$ make #(this creates the default executable flukahp and compiles auxiliary programs in the directory flutil)
Once installed, set some environmental variables at the end of your .bashrc file: (Type gedit .bashrc in your terminal to open and edit this file with gedit, or some other text editing software you wish to use)
export FLUPRO=/pathto/FLUKA #Path to the FLUKA folder where you installed FLUKA
export FLUFOR=gfortran #We use the gfortran version of FLUKA
Installation of flair and flair-geoviewer
Download the latest version of flair and flair-geoviewer from flair/download Most likely you will want the tar-gzip files:
flair-X.X-X.tgz
flair-geoviewer-X.X-X.tgz
When downloaded, expand the files to a temporary directory and enter this directory for installation
$ tar zxvf-flair-X.X-X.tgz
$ cd /pathto/flair-X.X-X #Path to the temporary directory just created
$ make install DESTDIR=/pathto/flair #install flair to a folder (named flair) of your choosing, preferably next to the FLUKA directory
Then delete the temporary flair-X.X-X directory. You can add an environment variable to your .bashrc to easily run flair from the command line, e.g.:
export PATH=$PATH:/pathto/flair #add this to the bottom of your .bashrc file and you can just type flair in the command line to start flair
To install flair-geoviewer you do the the same process again with the flair-geoviewer-x.xx-x.tgz file
$ tar xzvf flair-geoviewer-X.X-X.tgz #expand to a temporary directory
$ cd flair-geoviewer-X.X-X #enter the temproary directory
$ make
$ make DESTDIR=/pathto/flair install #OBS! DESTDIR=the folder where flair is installed!
Then delete the temporary directory and try to run flair!
$ flair
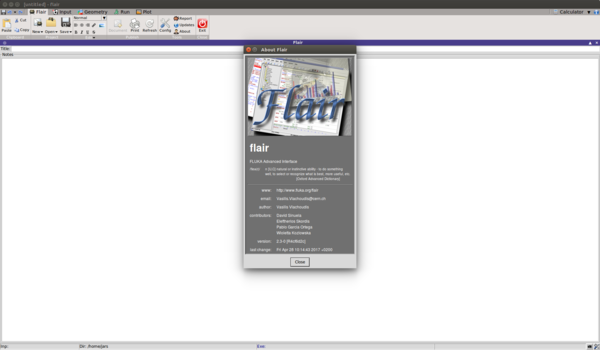
You should now be greeted by flair:

